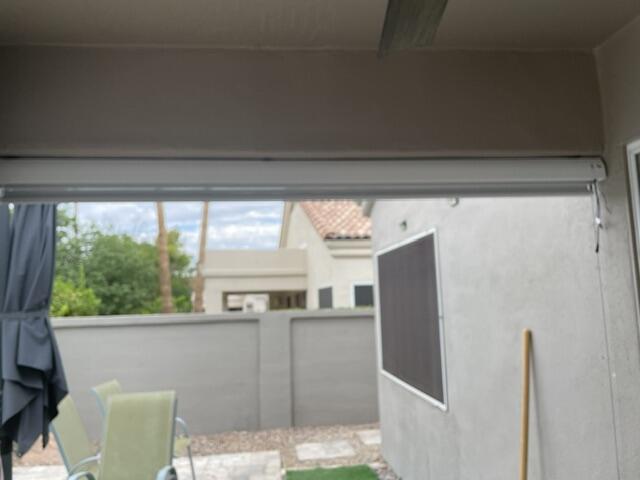
Why I Ignore the Roofline When Installing Patio Shades
I remember standing on my cedar deck with a glass of iced tea, feeling incredibly smug about my new charcoal-toned rollers until the sun started to set. The shade was perfectly flush with the heavy timber beam, yet the bottom hem looked like a playground slide compared to the horizon. That was the day I learned that installing patio shades requires you to ignore the very house you are attaching them to.
Architecture is full of lies. We want to believe our homes are built with perfect 90-degree angles, but out on the porch, those straight lines are an illusion designed to keep rain from pooling. If you trust your eyes over a laser level, you are going to end up with a crooked mess that bunches every time you try to roll it up.
Quick Takeaways
- Your porch ceiling is intentionally sloped for drainage; never use it as a leveling guide.
- A laser level is non-negotiable for a professional, 'no-bunch' finish.
- Always pre-drill and use masonry anchors if you are mounting into brick or stone.
- Tighter fabric weaves require more precision to prevent 'telescoping' on the roll.
- Bottom tie-downs are the only thing standing between peace and a clanging metal hem bar.
The 'Sloping Porch' Reality Check
Here is the hard truth: almost every patio or porch ceiling has a subtle slope. It is usually about a quarter-inch per foot, designed to shuffle rainwater away from your foundation. If you align your shade cassette perfectly with that wood beam, you are setting yourself up for a visual disaster. When you install patio blinds flush to a sloped header, the fabric unrolls at an angle. Against the horizontal line of your deck or the neighbor's fence, it will look like you did the job after three margaritas.
I have seen beautiful 120-inch wide exterior rollers ruined because the homeowner followed the roofline. The fabric starts to 'telescope'—meaning it shifts to one side of the roll—eventually fraying the edges of the material against the brackets. You have to be brave enough to leave a small, wedge-shaped gap between your shade and the ceiling to ensure the roller itself is perfectly level with the earth.
The Pre-Drill Prep (What You Actually Need)
Before you even think about climbing a ladder, you need to know what you are drilling into. Exterior headers are often wrapped in aluminum or vinyl soffit, which provides zero structural support. You need to find the actual wood header or a structural stud. If you are mounting into brick or stone, put down the standard drill and grab a hammer drill with a 3/16-inch masonry bit. Standard screws will just strip and leave you with a half-hanging heavy cassette.
I always recommend reviewing the How To Install Your Shades guide for your specific model to understand the bracket spacing. However, remember that those instructions assume a flat surface. When installing outdoor blinds on uneven stucco or rough-hewn timber, you might need to use stainless steel washers as shims behind the brackets to create a flat mounting plane. Never force a bracket to bend against a warped beam; you will just jam the internal mechanism.
My Strategy for Installing Patio Shades Level Every Time
My secret weapon is a self-leveling cross-line laser. I set it up on a tripod and project a perfectly level line across the entire length of the patio. This shows me exactly how much the porch drops from one side to the other. When I start the patio blinds installation, I mount the 'high' side bracket first, then use the laser line to position the second bracket so they are on the exact same horizontal plane, regardless of what the wood beam is doing.
This precision is especially vital if you chose something like Outdoor Shades 5 Openness. A 5% openness weave is dense enough to provide serious heat protection, but that density makes the fabric less 'forgiving.' If the roller is even an eighth of an inch off-level, the fabric will track sideways. By floating the bracket slightly off a slanted beam and filling the gap with a color-matched shim, you ensure the fabric unrolls perfectly parallel to your deck boards. It is the difference between a DIY job and a custom designer look.
Securing the Bottom (Because Wind Happens)
Learning how to install outdoor blinds is only half the battle; the other half is keeping them there. A beautifully leveled top cassette means nothing if the bottom hem bar is banging against your railing at the first sign of a summer breeze. Most high-end exterior shades come with a cable guide system or bungee tie-downs. Do not skip these.
I once lived in a house where the previous owner skipped the anchors, and every afternoon breeze sounded like a percussion section gone rogue. You can read more about Why Your Blinds Doors Patio Setup Clacks Every Time (And The Fix) to understand the acoustic nightmare of an unsecured shade. I prefer floor-mounted stainless steel pad eyes for bungees. They are low profile, so you won't stub your toe, and they keep the tension consistent so the fabric stays taut and elegant.
The Final Roll Test
Once the brackets are in and the shade is clicked into place, it is time for the moment of truth. Roll the shade all the way down and back up three times. If you see the fabric drifting toward one side of the tube, your level is off. This is when I make micro-adjustments. Sometimes a single thin washer behind the left bracket is all it takes to center the fabric perfectly. How to install outdoor roller blinds correctly often comes down to these last five minutes of fine-tuning.
Personal Experience: The Midnight Re-Do
A few years ago, I installed a massive 14-foot wide motorized shade on a West-facing porch. I was in a rush because guests were coming for a BBQ, and I ignored my own rule—I didn't use a laser level. By 6 PM, the shade was stuck. Because the header was sloped, the fabric had telescoped so far to the right that it jammed the motor. I spent the entire party with a half-crooked shade and had to spend my Sunday morning redrilling the masonry. I learned the hard way: the house might be crooked, but your shades cannot be.
Frequently Asked Questions
Can I install patio shades by myself?
If the shade is over 6 feet wide, no. You need one person to hold the heavy cassette and another to check the level and click it into the brackets. Trying to balance a 20-pound roller on a ladder is a recipe for a broken shade and a bruised ego.
What if my patio beam is extremely warped?
Use a mounting strip. Attach a straight, pressure-treated 1x4 board to the beam first, shimming it until it is perfectly level. Then, mount your shade brackets to that perfectly level board. You can paint the board to match your trim so it disappears.
Do I need to take my shades down in winter?
No, most high-quality exterior shades are built to withstand the elements. However, you should always leave them in the fully retracted (rolled up) position during high winds or snowstorms to protect the fabric and the motor.